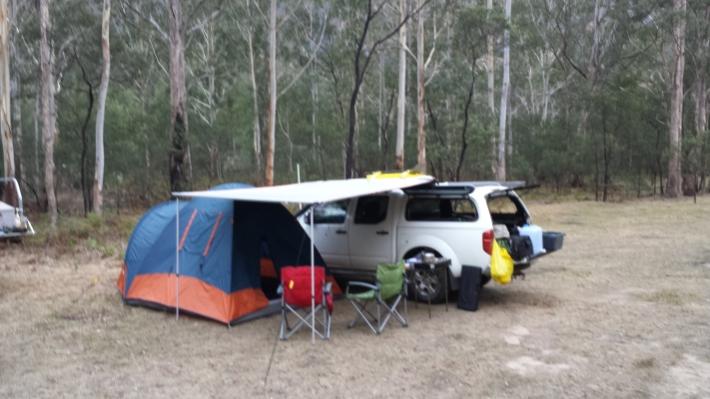
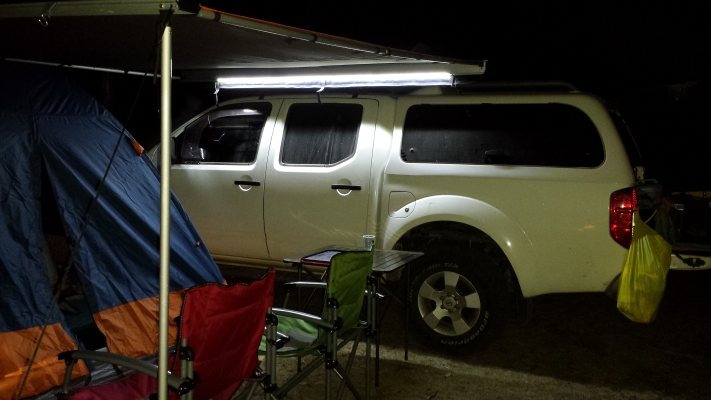
Well, Steve asked for it, here it is - my take on the Tough Toys 2.5m x 3m awning with LED light strip.
The awning once set up draws lots of comments on how large it is, how good it looks and how easy it was to set up - and that's the case. It's a great bit of kit, I'm grateful that Steve brought one to the Muster to give away and stoked to have one on my car now (no, I didn't win it!).
I have the Whispbar Pro Tradie (100kg) roof racks on my ute with a (gee, really?) Aldi Auto XS Roof Tray (well at $29 could you resist? I couldn't!).
The awning sits nicely along the side but hangs a little far out on my racks, plus the bracket inhibits the use of my ratchet tie-downs - both are easy to fix and some time this weekend it'll be done. I'll cut the supplied steel bracket back and slip a spacer underneath to clear the rack's tie point. This will render the thing perfect on my car. The awning can be slid forward and backward on the car as required by loosening the (supplied) 4 nylock nuts that hold the bracket to the back face of the awning.
The awning has foldout arms to support the sides and fold-out legs at the end. It can be assembled by one person - just use the supplied pegs and rope to hold the ends in place while you're getting the arms out.
You start by unzipping the protective cover and flipping it over the back, then undoing the front and rear velcro straps. Grabbing the awning, undo the centre velcro strap and then start pulling the awning out - it basically wraps around the outer support, so extending the awning is just a matter of unwrapping it.
Once you're out at full extension, reach into the outer support and pop out the legs. These are twist-lock legs with bluntish spikes (so you can't stab your foot) that slide into the outer support - once down, you can either rope the corners down temporarily or have someone hold the support out while you get the arms out.
The arms are tucked away inside the main support and swing out - hold them up, they are a little heavy for the support, and cause a fair amount of flex. When new, that won't be a problem, but my intention is to have the awning for some time - and eventually the aluminium (which is a brittle metal) will start to show signs of weakness and will fracture, so treating it with some care will give it longevity. The arms are also twistlocks and you just extend these into the holes on the supports.
One the arms are out and located in the outer support, you can lift the outer support and lock the legs into place. Then you just use the pre-fitted velcro straps around the arms and the awning's in place.
For our stay at Newnes, we used the supplied ropes and pegs to tie the awning into place in case the wind picked up a little. We were in a deep valley - and near the end of it too - it would have taken a killer westerly to get to us, but the awning did seem fairly secure.
The material looks sturdy but don't park too close to the campfire - we've got small ember burns in the top of our awning now (no, it's not a fire blanket, it's a bloody awning). Thankfully ToughToys sell replacement awning material!
A few of us stood under it when we stopped for lunch during the Lithgow run - when the rain and small hail started - jeez that water's cold!
At night we pegged it down and plugged it in. Only problem with the power in my car is the 12v cigarette adapter I've got in the tub is on the right hand side of the car half way between the front of the tub and the tail lights - and the cable's not long enough to reach there, because it plugs in to the front of the awning (designed for the cig lighter in the dash, of course, which it reaches with ease). I might try and unstick the strip and spin it around to suit my particular setup and will report back on that.
All in all, it's a fantastic addition to the car. It covered the tent entry with plenty of overlap and heaps of room for chairs and a table underneath. I highly recommend it! Enough jabber, here's some pics - there are HEAPS on the web site linked above, but my car is here:


