Watchdogg
Member
- Joined
- Oct 12, 2009
- Messages
- 126
- Reaction score
- 0
This is a how to guide to install a typical sound system in your dual cab D22 Navara.
First off the sound system that I was installing consisted of:
2 x 6 inch speakers
2 x 4 inch speakers
Sony head unit with 3 RCA ports (only needed 2)
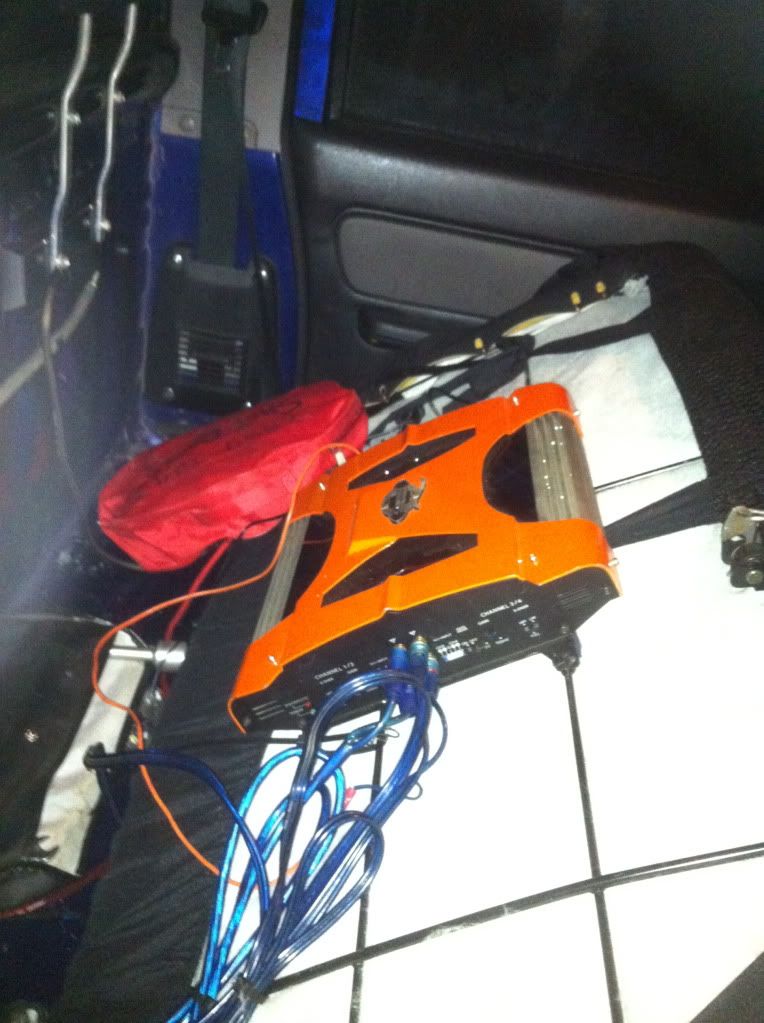
Cadence amplifier
SWS 10 Inch Subwoofer
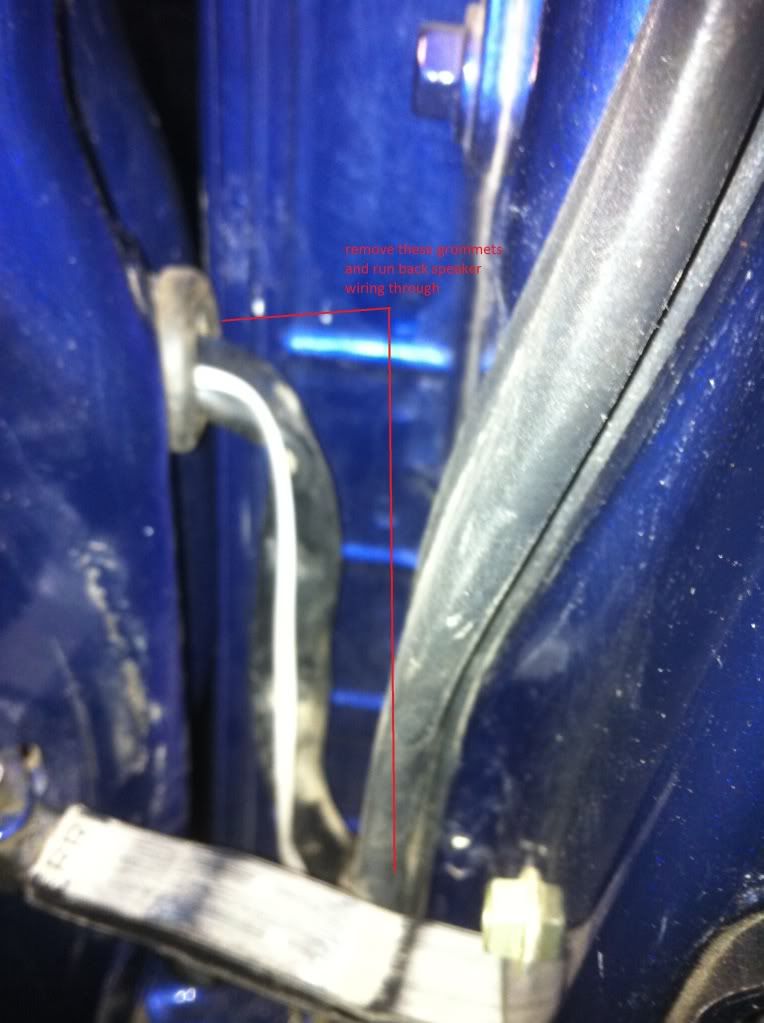
I installed the 2 back speakers from the amp as well as the sub. the front speakers are ran off the head unit.
Tools you will need:
Pliers
drill with phillips bit
stanley knife
offset tin snips or small keyhole saw or whateva is good at cutting holes
Small flat head screwdriver
big phillips head screwdriver
small phillips head screwdriver
socket set (in case you screw up the head of the screws they can be removed with socket set
materials:
2 Blue RCA leads
1 Red power lead (think mine was a 5 metre lead)
1 red power fuse holder
1 fuse
1 remote wire (should be inbuilt on one of your rca leads)
1 earth wire
2 "long" speaker wires with plugs already on them
1 subwoofer wire
cable ties (only need about 20 will do)
self tapping screws
mini little wood screws
PREPARING THE INSTALL
1. Centre Console
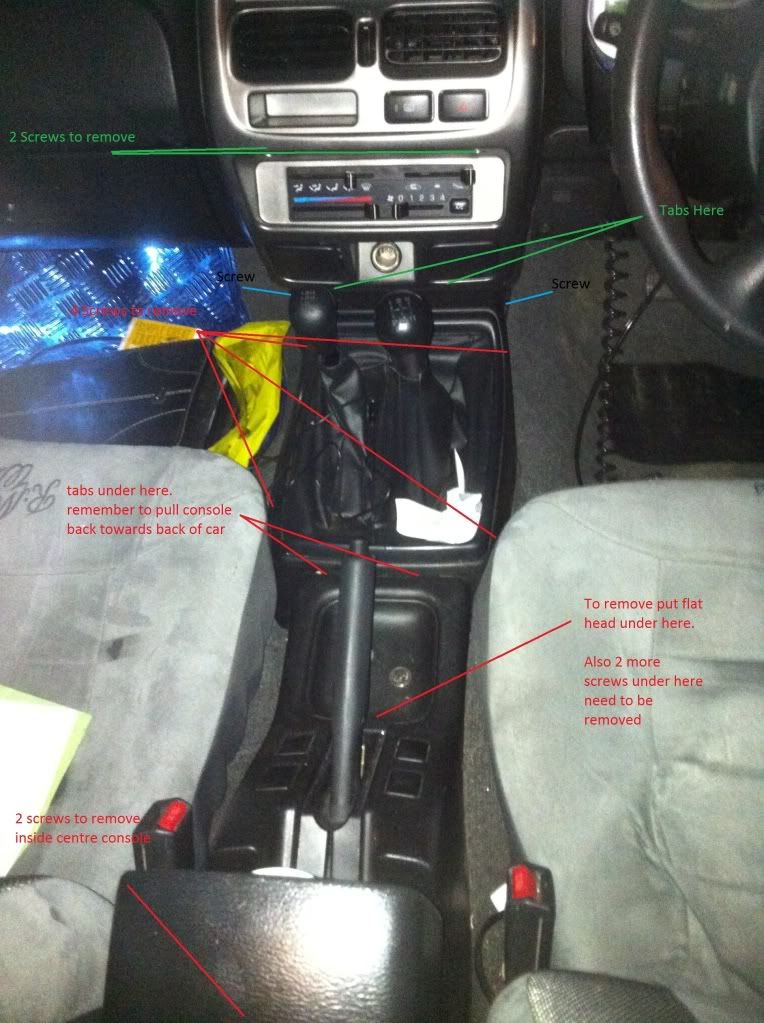
Okay now you need to remove a fair few things. First of all, you'll want to remove the centre console. How you do that is open the centre console. At the bottom inside it, are 2 screws. remove them. Once done so you need to remove the coin tray or whateva that thing is lol. to do that, closest to handbrake of the coin tray stick a flat head screw driver under it and lever it up, and it should pop off. could even use your hands. Under the tray are 2 more screws remove them. Now you just need to lift the console up from the back, pull it back towards the back of the car as there are 2 tabs conecting it to the shroud around the gear sticks, and then just lift up and around the gear stick and it should come off.
2. Gear lever shroud
To remove this is simple. There are 4 Screws 2 on each side its not rocket science you will see this remove them and it will come off. Also the vinyl around the gear sticks to get that off the shroud just pull it towards the sticks and it will flex off, they are just clipped in. i removed it, but you don't have to. Then just pull it up out of your way. (dont need to take it off, just leave it handing there on top of gear sticks)
Also there is another little shroud between that one and the centre dash face. 2 screws to remove shown in diagram.
3. Centre of dash face
Okay this is easier then it looks. All you need to do is remove 2 screws shown in the picture. At the bottom of the face there are 2 tabs that hold it in place. what you need to do is get that small flat head screw driver and jam it under the dash face and lever the screw driver down to pop the face off at the bottom. once its popped out just proceed to pop off the rest starting at bottom and work way to top. its all little clips. be sure to keep a watchful eye as they like to fall off the face and disappear in the car somewhere. Then take out your head unit. its 4 screws. then the clip at the back just cut the wires as you will have a new wiring harness with your new head unit
4: Side trims
Get your little phillips head and undo the black trims (black strips that between door and carpet. you will see the screws. put ur finger under them and don't pull to hard that is the trick and the screws will come out. then just pull them up and off they come. do that for all of them. Also remove the panel that is next to the drivers pedal to the right. its one screw and it has a pop in clip at the top of it so just give it a yank.
5. Seat belt covers
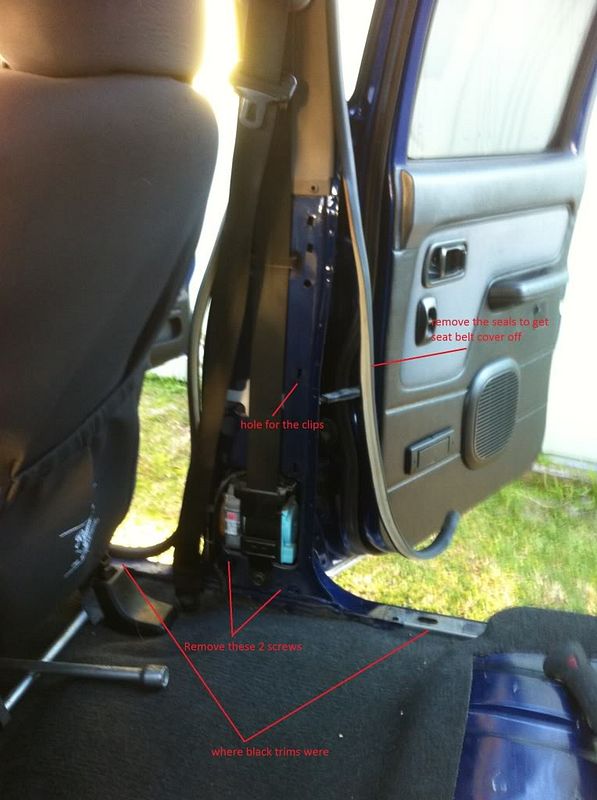
There are 2 screws at the bottom of each one. remove them. then remove the seals off either side. shown on picture. then starting from the bottom pull it off, as its clipped in. I used a big flat head and jammed it out around each clip to be safe. still managed to break one by accident so be careful.
6. Door trims
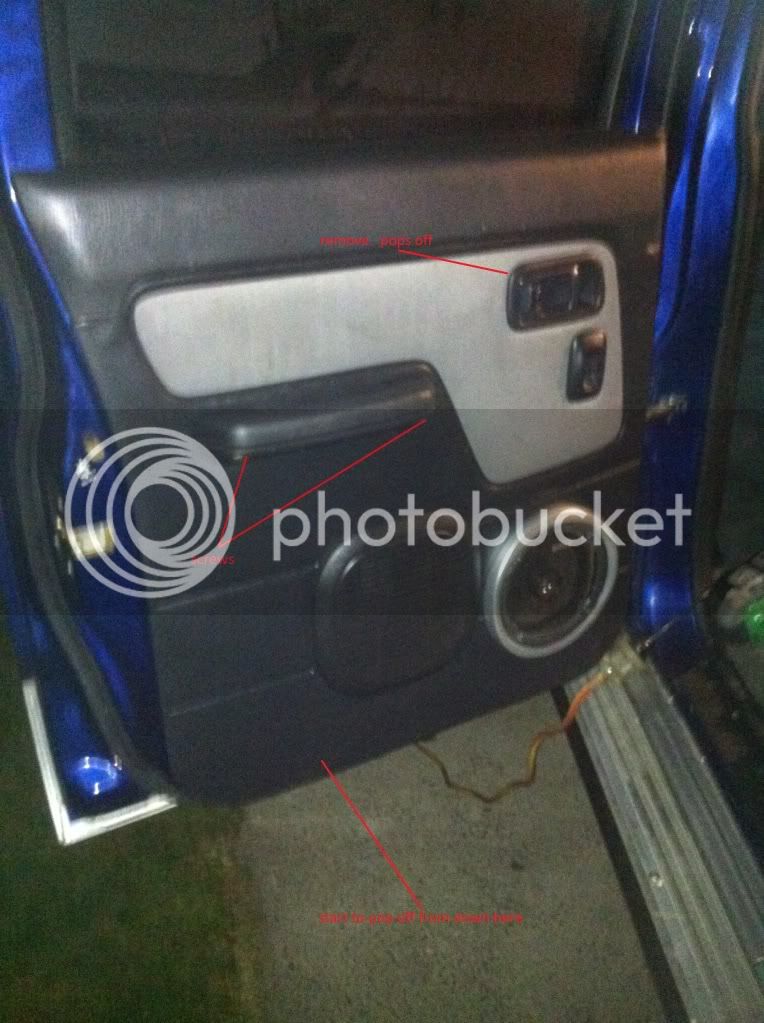
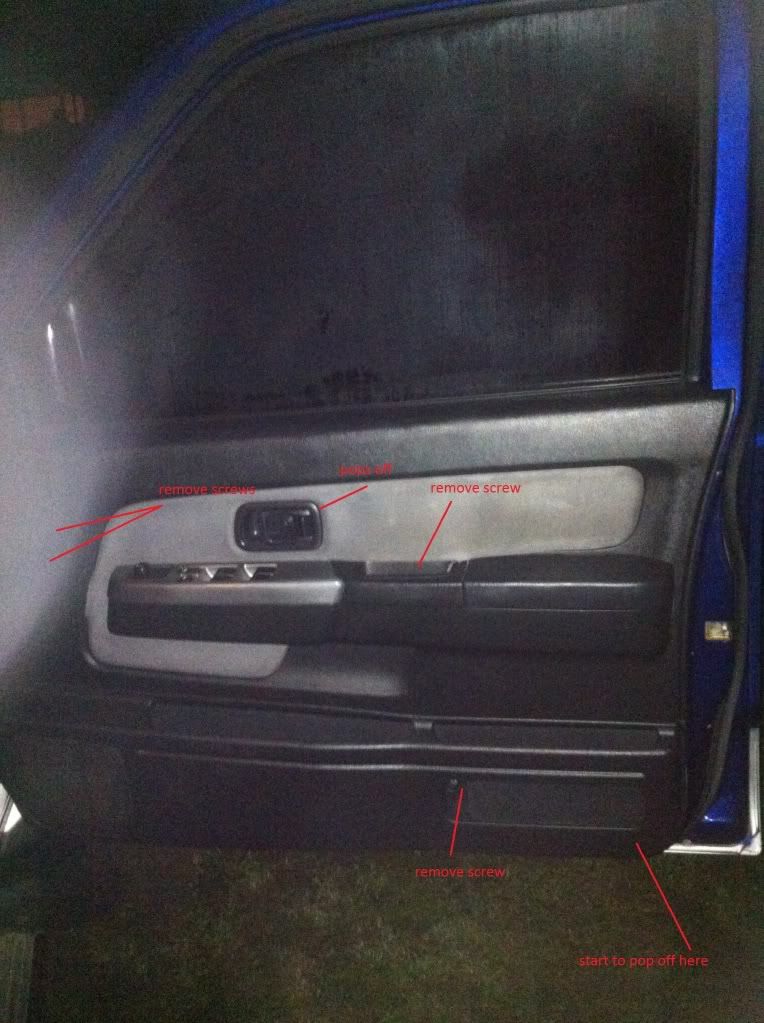
For back door remove the little clip in thing wateva its called from around the door lock. it just pops off, shit im bad with names haha. remove the 2 screws from the door handle. for front doors 3 extra screws refer to drawings. all you need to do once screws are remove is starting from bottom grab the door trim with your fingers and pop it off clip by clip till you get to the top. once its all popped lift up the trip then it will come off. then you need to disconnect the power window clip. this is done by pushing down really hard on that little tab in the middle of the clip and pulling the clip apart.
First off the sound system that I was installing consisted of:
2 x 6 inch speakers
2 x 4 inch speakers
Sony head unit with 3 RCA ports (only needed 2)
Cadence amplifier
SWS 10 Inch Subwoofer
I installed the 2 back speakers from the amp as well as the sub. the front speakers are ran off the head unit.
Tools you will need:
Pliers
drill with phillips bit
stanley knife
offset tin snips or small keyhole saw or whateva is good at cutting holes
Small flat head screwdriver
big phillips head screwdriver
small phillips head screwdriver
socket set (in case you screw up the head of the screws they can be removed with socket set
materials:
2 Blue RCA leads
1 Red power lead (think mine was a 5 metre lead)
1 red power fuse holder
1 fuse
1 remote wire (should be inbuilt on one of your rca leads)
1 earth wire
2 "long" speaker wires with plugs already on them
1 subwoofer wire
cable ties (only need about 20 will do)
self tapping screws
mini little wood screws
PREPARING THE INSTALL
1. Centre Console
Okay now you need to remove a fair few things. First of all, you'll want to remove the centre console. How you do that is open the centre console. At the bottom inside it, are 2 screws. remove them. Once done so you need to remove the coin tray or whateva that thing is lol. to do that, closest to handbrake of the coin tray stick a flat head screw driver under it and lever it up, and it should pop off. could even use your hands. Under the tray are 2 more screws remove them. Now you just need to lift the console up from the back, pull it back towards the back of the car as there are 2 tabs conecting it to the shroud around the gear sticks, and then just lift up and around the gear stick and it should come off.

2. Gear lever shroud
To remove this is simple. There are 4 Screws 2 on each side its not rocket science you will see this remove them and it will come off. Also the vinyl around the gear sticks to get that off the shroud just pull it towards the sticks and it will flex off, they are just clipped in. i removed it, but you don't have to. Then just pull it up out of your way. (dont need to take it off, just leave it handing there on top of gear sticks)
Also there is another little shroud between that one and the centre dash face. 2 screws to remove shown in diagram.
3. Centre of dash face
Okay this is easier then it looks. All you need to do is remove 2 screws shown in the picture. At the bottom of the face there are 2 tabs that hold it in place. what you need to do is get that small flat head screw driver and jam it under the dash face and lever the screw driver down to pop the face off at the bottom. once its popped out just proceed to pop off the rest starting at bottom and work way to top. its all little clips. be sure to keep a watchful eye as they like to fall off the face and disappear in the car somewhere. Then take out your head unit. its 4 screws. then the clip at the back just cut the wires as you will have a new wiring harness with your new head unit
4: Side trims
Get your little phillips head and undo the black trims (black strips that between door and carpet. you will see the screws. put ur finger under them and don't pull to hard that is the trick and the screws will come out. then just pull them up and off they come. do that for all of them. Also remove the panel that is next to the drivers pedal to the right. its one screw and it has a pop in clip at the top of it so just give it a yank.
5. Seat belt covers
There are 2 screws at the bottom of each one. remove them. then remove the seals off either side. shown on picture. then starting from the bottom pull it off, as its clipped in. I used a big flat head and jammed it out around each clip to be safe. still managed to break one by accident so be careful.

6. Door trims
For back door remove the little clip in thing wateva its called from around the door lock. it just pops off, shit im bad with names haha. remove the 2 screws from the door handle. for front doors 3 extra screws refer to drawings. all you need to do once screws are remove is starting from bottom grab the door trim with your fingers and pop it off clip by clip till you get to the top. once its all popped lift up the trip then it will come off. then you need to disconnect the power window clip. this is done by pushing down really hard on that little tab in the middle of the clip and pulling the clip apart.


